No matter if you are a store owner or a single jewelry designer, at some point you will have to decide how you are going to get your jewelry pieces out to the world. You will need some nice jewelry photos to show the beauty of your jewelry.
This article is written to help you find a way to get your jewelry photography to a point of good quality to post online. We have included links to some of our favorite Amazon products and may earn commission from qualifying purchases.
You can hire a professional photographer which will get you the best looking results. Especially, if you are looking to have large-scale print advertisement, you won’t get around hiring a professional photographer. Crisp photos with sharp smaller details are really only possible with expensive equipment, macro lenses and photography knowledge.
If you have an online store with one-of-a-kind pieces or inventory that changes often, that is not a very viable or affordable option. There are many ways out there to get a photography set-up at a low-budget with decent results.
Step 1: Taking your photos
In this article, we will talk about the set-up we think is the most convenient and affordable way for a small store to take jewelry photography. A professional photographer would be able to take the photos without having to do much clean-up or corrections afterward. With a cheaper set-up, it requires more touch up in Photoshop though.
Step 2: Cleaning up your images
Cleaning up your images and enhancing them is almost more important than taking the picture itself, if you don’t have a perfect photography set-up or education! You can either clean them up yourself or hire somebody to do the Photoshop clean up for you. If you need some tips on how to clean up your jewelry photography, read our article about jewelry clean up in Photoshop >>

Photoshop Touch-Up Services
If you do not have a person on staff who can clean up your jewelry for you, we would be glad to do it for you. Email us your photos and we can touch it up and remove the background for you. Prices will charged an hourly rate since time per piece will depend on simplicity of the pieces.
The Camera:
There are a few different types of cameras: automatic, semi-manual digital cameras (point and shoot) and Digital SLR ( Single Lens Reflex) cameras. For this article, we want to focus on the automatic and semi-manual digital cameras, since DSLR Cameras are not only more expensive but also harder to use and require some photography knowledge.
Point and shoot cameras are fully automatic and most people are familiar with them. They are available at all price classes starting from as little as $25. There will be a few things to consider when buying a camera. We are not experts in cameras but your sales associate in your local store can help you decide on what you really need.
Iphone and other cell phones:
Cell phones have come a long way and if you have a newer iphone you will most likely have a macro function on your camera. The advantage of cell phones is that its always on hand, light to carry and these days have a great resolution.
The downside of iphone cameras is that its a not the best for advanced “depth of field stacking” practices.
DSLR Cameras:
DSLR cameras are the perfect solution, if you are a bit more serious about your photography and have a medium budget to make this happen. There are models out there that are the beginners version of the professional cameras and will do the trick just fine.
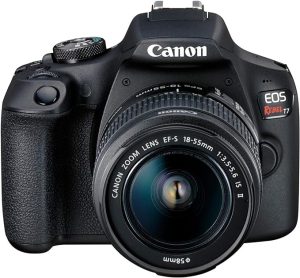
We prefer the Canon DSLR’s as it comes with the very handy canon utility software, that allows you to look through the camera from your desktop computer, zoom into details and be able to get them very sharp. It makes focusing on different depth a breeze.
Some important camera functions for jewelry photography:
Mega Pixel: Even though everybody talks about how many mega pixels their camera has, for website purposes even a 3MP camera will work. Since computer monitors are at a 72 resolution, we don’t need a high megapixel number. More mega pixels don’t necessarily mean better quality but more pixels per inch which results in bigger print sizes.
Here are some examples as a guideline:
- Computer Monitors / Non-retina – 1-3 mega pixels
- 6×4 prints – 2 mega pixel
- 10×8 inch prints – 5 mega pixel
- 14×11 inch prints or larger – 7 mega pixels and up
Macro Mode: This is the mode that actually lets you get closer to your object. This is probably the most important function you need on your camera for jewelry photography. You can recognize the function as the “Tulip” symbol on your camera.
F-stop or Aperture: The f-stop or aperture controls the depth of field on a camera, which would be preferred. (Some lower end point and shoot cameras won’t have that function.)
The learning curve is a bit steeper for these cameras but they can produce a very nice professional result. The canon eos rebel is a great starter camera.
For jewelry photography you will also need a macro lens. This will enable you to get closer shots when you need to show detail.
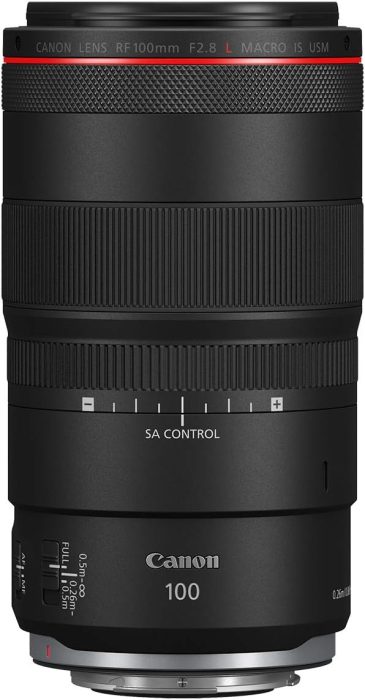
The perfect lens for jewelry photography
A macro lens is indispensable for jewelry photography due to its unparalleled ability to capture intricate details at close range. Jewelry, with its delicate textures, fine engravings, and tiny gemstones, demands precision and clarity in imagery to showcase its craftsmanship and allure effectively. A macro lens allows the photographer to get exceptionally close to the subject, revealing even the most minuscule elements with sharpness and depth. Whether it’s capturing the facets of a diamond, the filigree of a pendant, or the delicate patterns of a ring, a macro lens ensures that every aspect of the jewelry is portrayed with stunning clarity, making it an essential tool for achieving professional-quality images in this specialized field.
We use a 100mm marco lens for our jewelry photography.
Canon 100mm Macro LensThe Set-Up:
To avoid reflection of the surrounding in polished jewelry, you will need some kind of light box.
The “Almost-No-Budget” Solution: You could take a cardboard box and paint the inside white. Some people use a fishbowl and spray it with the frosted finish spray paint from a home improvement store to get a diffused lighting dome.
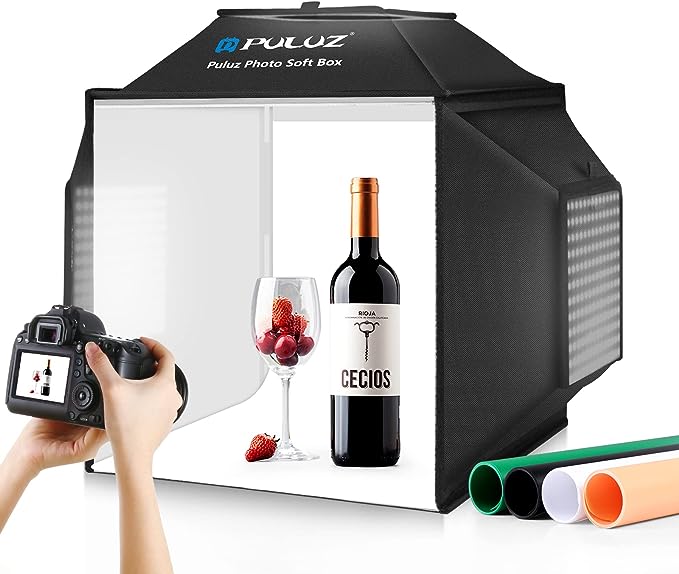
The Box: Pop-up boxes can be bought online for as little as $10. We prefer this option for it’s not only portable but also can be folded and put away when you don’t need it.
Some pop-up lightboxes come with two led light strips which provide a good amount of light. We sometimes like to have additional lights on stands if we want more light to reflect off diamonds or other metal surfaces.
Get our favorite lightbox here:
With jewelry photography, you don’t always what the light from straight above the item. This featured lightbox has side lights as well to reduce shadows.
Photobooth with 3 Light PanelsThe Lighting: Ideally, you would be able to take your photos outside in daylight. If you don’t have that option, you can get the kit above or use come clamp lights from a hardware store with the bell-shaped reflectors with 5000K daylight balanced bulbs, if possible.
If you have a diamond color-grading box, you might be able to photograph smaller items in there.
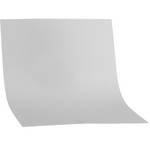
The Backdrop: The soft boxes come with backdrops in different colors. For jewelry though, we prefer a more solid option. You can use a piece of Plexiglas or some thicker cardboard, a piece of frosted glass etc.
Backdrop >>If you have a Plexiglas company in the area, ask them to bend a white sheet with a curve of about 85 degrees to achieve an endless backdrop and you can hang chain and necklaces on the back, drill holes for earring posts etc. The advantage to a hard surface is that you will be able to get holding wax and position your rings in an upright position.
The Tripod: Always use a tripod! Almost anything can be fixed in Photoshop but not a blurry image. Be sure to always use a tripod and if your camera has the option, use the time-delayed function to avoid camera shake.
Tripod for CamerasIf you are using a point-and-shoot light camera, the small tripods will do the trick but if you have one of the SLR cameras, you will need something more sturdy that won’t fall over and damage your camera.
Things to consider:
- Make sure there are no fingerprints on your pieces. The same is true with any lint that might have gotten caught in a prong.
- Where is the reflection of the light? Is the light directly hitting the stones, creating a white stone? Or windowing in the gemstone?
- How is your angle? Are you showing the top of the ring or also its shank? Do you want to show the side view as well?
- If you are shooting Opals, you might need an additional LED flashlight to bring out some of the color play.


