

Soldering with a torch is an essential skill for jewelry makers, allowing them to join metal components securely and create intricate designs with precision. While the thought of using a torch may seem intimidating at first, with the right tools, techniques, and practice, you can master this versatile method of metalworking. In this beginner’s guide, we’ll demystify the art of soldering with a torch and provide you with the knowledge and confidence to embark on your soldering journey.
Understanding the Basics:
Before diving into the soldering process, it’s essential to understand the basic principles behind it. Soldering is the process of joining two or more metal components together using a filler metal called solder. The solder is heated to its melting point and then flowed into the joint, where it solidifies, creating a strong and permanent bond between the pieces.
Choosing the Right Torch:
The first step in soldering with a torch is selecting the appropriate torch for your needs. For jewelry making, a small handheld torch, such as a butane torch or a micro torch, is often sufficient. These torches offer precise control over the flame size and temperature, making them ideal for soldering delicate metal components.
Gathering Your Materials:
In addition to a torch, you’ll need a few other essential materials to get started with soldering:
- Solder: Choose a solder alloy that melts at a lower temperature than the metal you’re soldering. Common solder alloys for jewelry making include silver solder and gold solder.
- Flux: Flux is a chemical compound that helps to clean the metal surfaces and promote the flow of solder. Apply flux to the joint before soldering to ensure a strong bond.
- Heat-resistant surface: Use a soldering pad or firebrick to protect your work surface from heat damage.
- Safety equipment: Wear safety glasses and heat-resistant gloves to protect yourself from the intense heat of the torch.
Preparing Your Workpiece:
Before soldering, it’s crucial to prepare your workpiece by cleaning the metal surfaces and ensuring a tight fit between the components to be joined. Apply flux to the joint area to remove any oxides and contaminants and improve solder flow.
Soldering Technique:
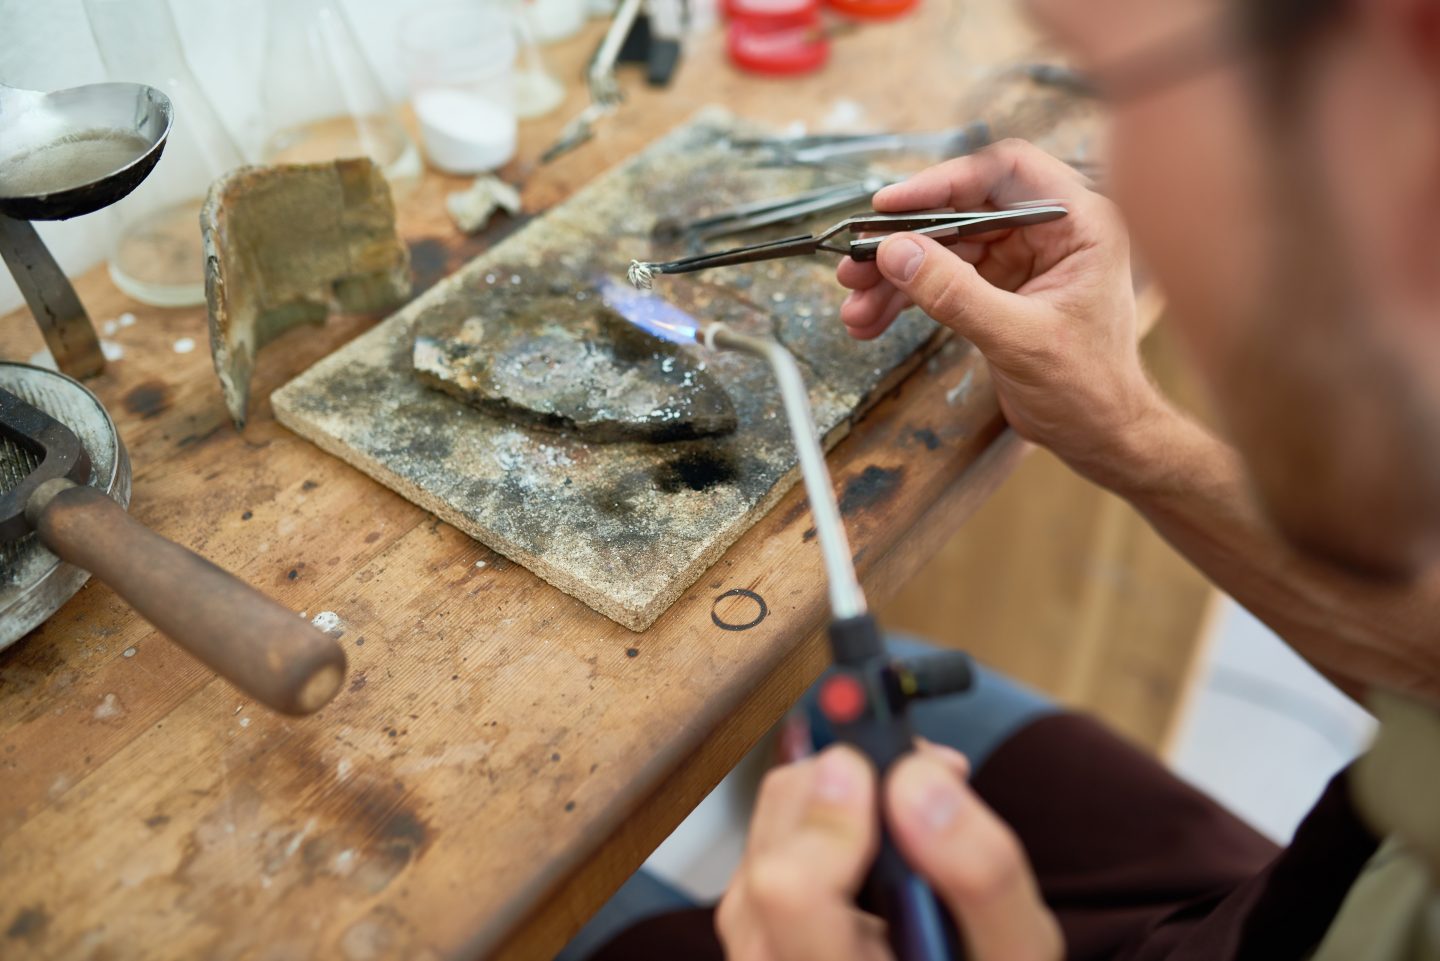
Once your workpiece is prepared, it’s time to begin the soldering process. Here’s a basic step-by-step technique for soldering with a torch:
- Position the workpiece on a heat-resistant surface and secure it in place with binding wire or tweezers.
- Ignite the torch and adjust the flame to a medium-low setting.
- Direct the flame onto the joint area, heating it evenly to bring the metal components to the solder’s melting point.
- Once the metal reaches the appropriate temperature, touch the solder to the joint, allowing it to flow into the gap between the components.
- Remove the flame and allow the solder to cool and solidify, forming a strong bond between the pieces.
Practice Makes Perfect:
Soldering with a torch is a skill that takes time and practice to master. Start by practicing on scrap metal pieces before moving on to your jewelry projects. Experiment with different flame sizes, temperatures, and soldering techniques to find what works best for you.
Safety First:
When working with a torch, always prioritize safety. Ensure adequate ventilation in your workspace, and never leave the torch unattended while lit. Always follow the manufacturer’s instructions for operating the torch safely.
Conclusion:
Soldering with a torch opens up a world of creative possibilities for jewelry makers, allowing them to create intricate designs and secure metal joints with precision. By understanding the basics of soldering, choosing the right tools and materials, and practicing proper technique, you can confidently embark on your soldering journey and bring your jewelry designs to life. So don’t be afraid to fire up that torch and let your creativity soar!